

We’ve all seen those stunning cheese boards on Instagram and Pinterest. You know, the ones that leave you running to the fridge to find the wedge of cheese you might still have from last week’s party? They might look like they belong on the cover of Bon Appétit but, trust us, you can recreate these masterpieces at home with a little patience and the help of this guide.

SHOPPING LIST
Cheese:
Select at least 1 from each category.
- Something Soft (Burrata, Brie, Fresh Ricotta)
- Semi-Soft (Gouda, Blue Cheese, Colby, Havarti)
- Semi-Hard (Manchego, Gruyere, Asiago, Jarlsberg)
- Hard (Aged Cheddar, Parmigiano Reggiano, Comte)
Bread:
Select at least 2.
- Crackers (water crackers are a great choice, they allow you to enjoy the flavors of the cheese)
- Baguette (preferably with a crusty exterior)
- Breadsticks (the hard variety that come in a box)
Meat:
Select a variety of meats to compliment the cheeses you’ve picked.
- Prosciutto
- Salami
- Quality Pepperoni
Nuts:
- candied pecans
- Marcona Almonds
- Pistachios
- Smoked Almonds
Fruit:
- dried apricots
- fresh strawberries
- figs
- dates
- sliced apples
- sliced pears
- melon
- grapes
Other Additions:
- fig jam
- pepper jelly
- roasted red peppers
- olives
- Caponata
- honey
Board:
- If you already have a cheese board or large wooden cutting board, you can use that. If not, look for a large wooden board or slate cheese platter.

ASSEMBLING THE CHEESE BOARD
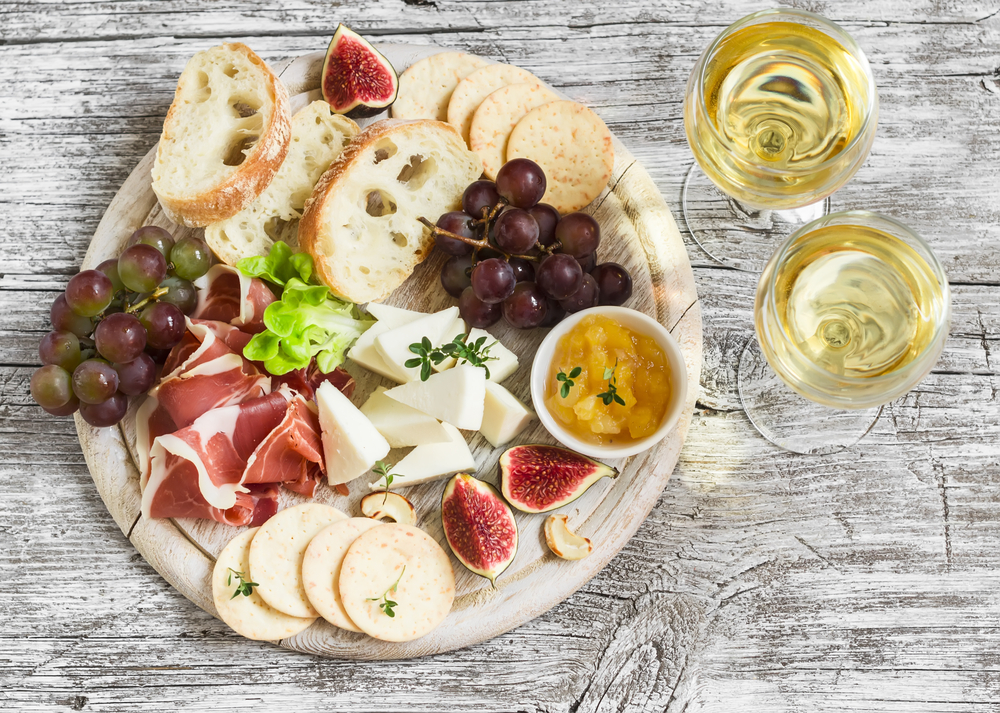
Now that you’ve gathered all of your ingredients, it’s time to assemble your cheese board. There is no right way to put all of your ingredients together, but we do have a few tricks that will help.
- Cheese should not be served straight from the refrigerator. Remove an hour before serving.
- Keep stinky cheeses separate. If you picked a strong-smelling cheese, it’s best to put it on a separate plate so it doesn’t mask the scents of the other cheeses.
- Place your cheese before anything else. Spread cheeses out across the board and don’t forget to include a unique cutting tool (cheese knives work well) for each cheese.
- Add the Meat group leaving plenty of room between the cheese and meat. Vegetarian guests will thank you for this and you’ll appreciate that the oils from the meat don’t rub off on all of your cheese.
- Now add your Fruit and Nut groups. These are great barriers to separate the cheeses and meats. If you have watery fruit, like melon, it’s best to include it in a small glass bowl.
- Fill the board! Any additional space can be filled by your olives, jams, honeys, etc.
- Create a bread basket. Slice your baguette and place all items from the Bread group in a separate basket or bowl.
- Enjoy It! The best part of creating a cheese board is getting to enjoy it. Snack away and don’t forget to pair it with some great bottles of wine, which you can find in our online store.
Now that you’ve created your Insta-worthy cheese board, snap a picture and tag us on social. Don’t forget to tell us what you’re pairing each cheese with!
Beaujolais is great for any occasion that calls for a red wine without a lot of tannin. The traditional method of winemaking in the region, carbonic maceration, attenuates the bitter qualities of red grapes, instead bringing out flavors of fresh berries and flowers. This Brouilly, from sixty year-old vines, is great served slightly chilled with semi-firm cheeses.